
Do you want to create an Android game? Or maybe you want to create the game for the IPhone or the IPad? Everything is possible with LibGdx! It is a good entry point for mobile game making. With LibGdx you can easily create lightweight game for many platforms with writing the code once. This “game skeleton” is quite popular, fast, has great community and wiki site, it supports OpenGL, Box2D, Bullet,
What will you build during this course?
Getting curious? Check that black mystery box underneath! Click on it and see what happens!
But wait a minute... Do you call this a game? I've played many hours in Battlefield, GTA, Heroes of the Storm and many more. None of those games were like a black box with white circles running around.
If you think like that - you are correct!
So what is the purpose of creating such boring stuff? You'll learn basic concepts of game making like: physics, collisions, coordinates, delta time, rendering in OpenGL and many, many more. Those concepts are universal for every game which you will create in the future, so even if this is not the game from your dreams - I encourage you to create this "hello world game"!
Initial settings
Why LibGdx? There are many frameworks and libraries where you can start. This one is just an example of making things. You might choose Construct2D, Unity etc. but other concepts of game making will remain the same. Okay, let's start!
Firstly you will have to have Java installed on your computer and JDK set up so if you type in your console:
javac -version
You shall see something like:
javac 1.8.0_231
Android SDK
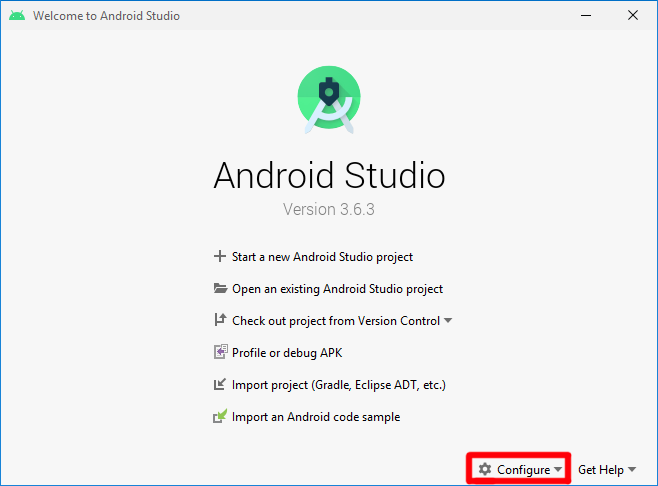
To get your android SDK you have to download the Android Studio. You can get it from here: https://developer.android.com/studio
After downloading and installing it, you can check/manage your current SDK's and also check the path to your local Android SDK (which will be needed soon):

LibGdx
To get started with LibGdx, download the setup app from the website: https://libgdx.badlogicgames.com/download.html
Application itself looks like below:
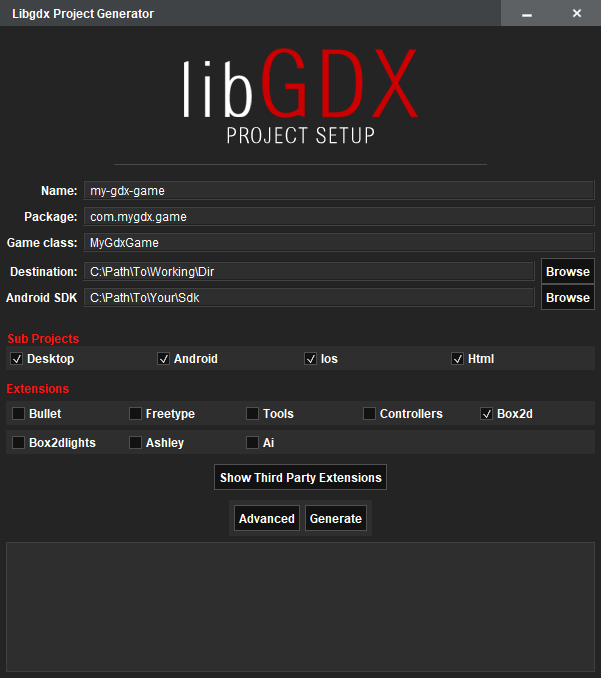
Let's talk about Setup App first. You can see there some similar things which may be found in any other Java IDE.
- Name - Obviously it is the name of your Gradle project, you can name it whatever you like. In my case I will name it Circles.
- Package - Main Java package name in your project
- Game class - Name of the Java class where the core code of your app will be stored.
- Destination - Dir where the project will be saved
- Android SDK - Path to your android SDK which can be found here.
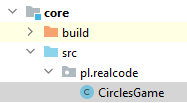
After creating your project you shall see the file structure like this:
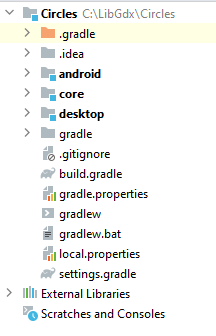
Depending on the platforms which you choose, the specific folders would appear. I've chosen Android and Desktop version of my project - that's why android and desktop folders are present. Core folder is the common part of your project. Main idea of this approach is to write logic once and deploy anywhere. Platform specific folders should contain only platform related files like for example reading gyroscope data for the mobile app.
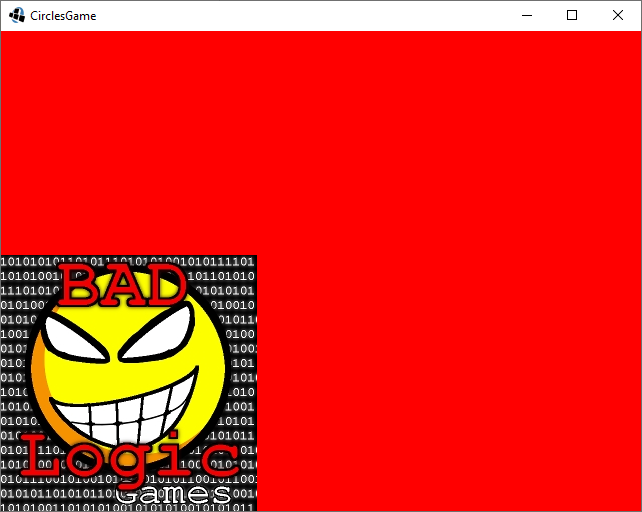
Ok we're good - now let's check if the project is working fine. Go to DesktopLauncher class:

And run the main function using the green play button or using shift+F10.
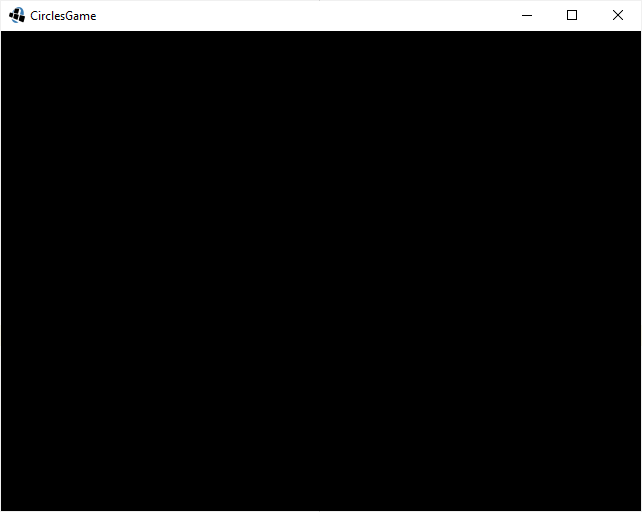
If everything went good you shall see your first LibGDX Hello World program!
Now let's take a look how this screen is rendered. Go to core folder and open your main game class.
You can see there a class which extends the ApplicationAdapter and overrides three methods:
- create() - function let's you to initialize your sprites, audio etc. This should be your main place to create things which can be created once when the program starts.
- render() - this is the place where everything is going on all the time, you can update here position of the image, create a new object, check the input like keyboard or mouse and so on.
- dispose() - here you can get rid off sprites and other objects which where created inside the create() function
package pl.realcode;

import com.badlogic.gdx.ApplicationAdapter;
import com.badlogic.gdx.Gdx;
import com.badlogic.gdx.graphics.GL20;
import com.badlogic.gdx.graphics.Texture;
import com.badlogic.gdx.graphics.g2d.SpriteBatch;

public class CirclesGame extends ApplicationAdapter {
	SpriteBatch batch;
	Texture img;

	@Override
	public void create () {
		batch = new SpriteBatch();
		img = new Texture("badlogic.jpg");

	}

	@Override
	public void render () {
		Gdx.gl.glClearColor(1, 0, 0, 1);
		Gdx.gl.glClear(GL20.GL_COLOR_BUFFER_BIT);
		batch.begin();
		batch.draw(img, 0, 0);
		batch.end();
	}

	@Override
	public void dispose () {
		batch.dispose();
		img.dispose();
	}
}
Please take a minute and read the code above. Once you've imported the project to your IDE you can check what arguments are needed by those methods.
glClearColor takes 4 arguments as RGBA color with an extra alpha layer which allows to set the transparency. It is called each time the tick of the app is done and fills the screen with color RED.
glClear is used to clear all the previously rendered contents.
batch object is an instance of the SpriteBatch which is self explanatory.
It can create the batch of the sprites and then render it to the screen.
Logic of our game
First of all we would need our circle! Let's create the Circle class inside the core folder:
package pl.realcode;

public class Circle {
    private double x;
    private double y;
    private int radius;
    private double vy;
    private double vx;
    private double ax;
    private double ay;

    public Circle(int x, int y, int radius) {
        this.x = x;
        this.y = y;
        this.radius = radius;
    }
}
x and y are the points describing the center of our circle, and radius is the radius of the particular circle. Next we have the velocity in both axis. But besides the velocity we would need an acceleration in order to see something more interesting than circles going around with the same speed. Let's add some randomness - we will create utility function which will return random number by passing to it minimum and maximum value:
package pl.realcode;

import java.util.Random;

public class Utils {

    public static int rand(int min, int max) {
        Random rand = new Random();
        return rand.nextInt((max - min) + 1) + min;
    }
}
And now let's use it in our Circle.java constructor. I have chosen the correct values by experimenting with them and those gave me the best outcome but you can change them as you want!
public Circle(int x, int y, int radius) {
        this.x = x;
        this.y = y;
        this.radius = radius;

        vy = Utils.rand(-20, 20);
        vx = Utils.rand(-20, 20);
        ax = Utils.rand(-15, 15);
        ay = Utils.rand(-15, 15);
    }
This game world will use our physic which is not ideal. If you want to have more realistic movement or collisions you can try to create the same project using for example Box2D library.
Colissions
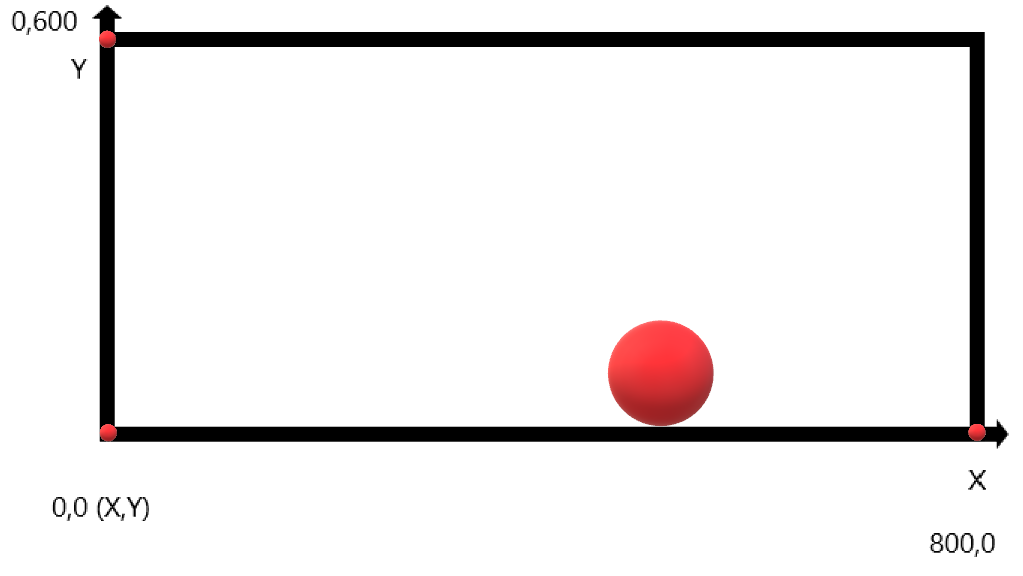
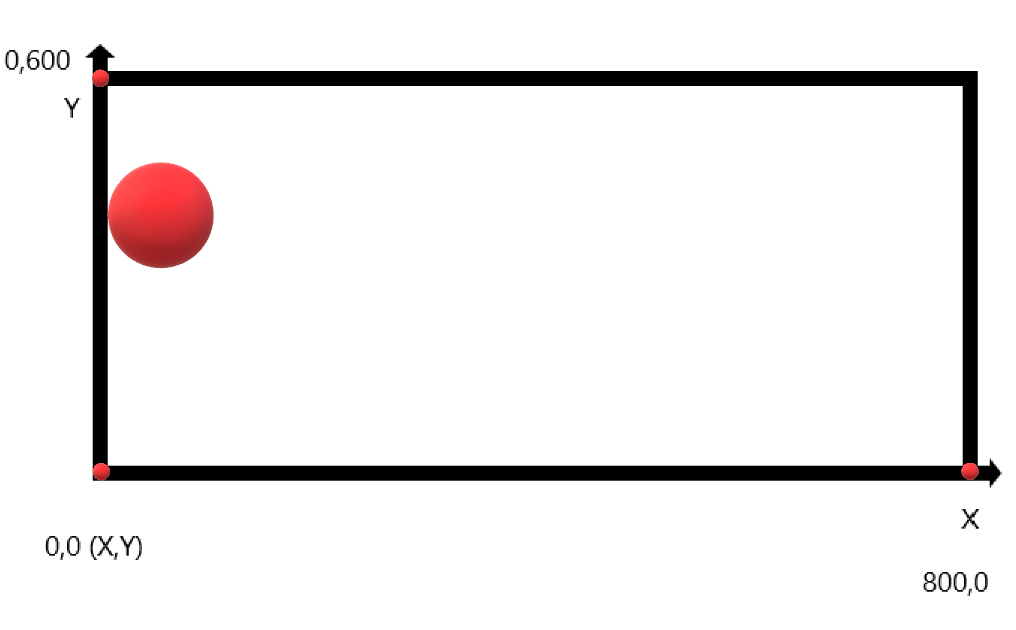
We have to check each edge: Top, Right, Bottom and Left. In order to do that we have to check the four conditions. Let's assume that our board will be 800 pixels wide and 600 pixels high.
Top - when the point y plus radius will be bigger than 600 - then we are on the edge:
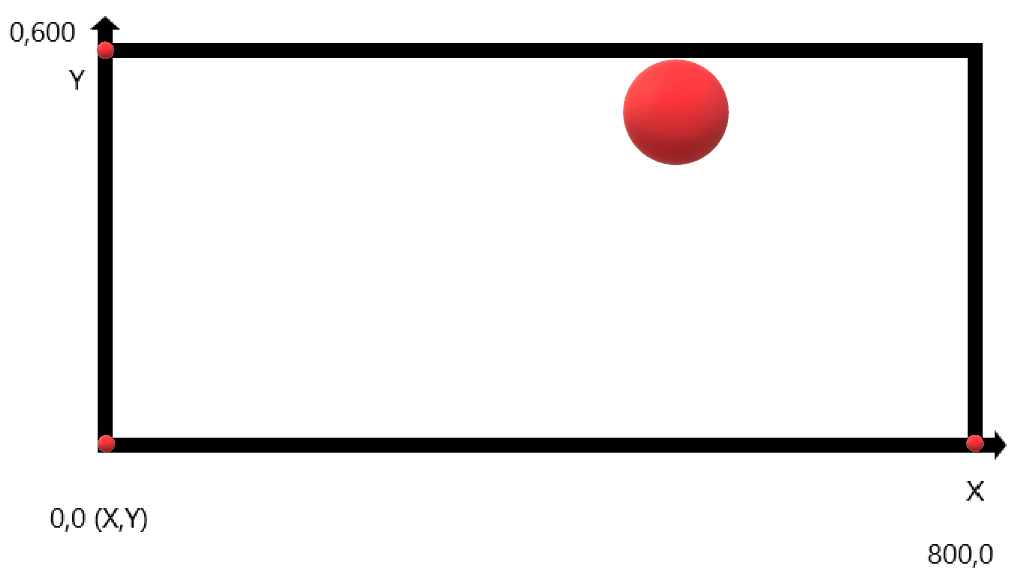
Right - when the point x plus radius is bigger than 800:

Bottom - point y minus radius is lower than 0:
Left - x minus radius is lower than 0:
Okay, condition met. But what do we have to do next? In order to change the direction we have to negate the velocity and change the position of the circle to be inside the screen rectangle. Let's translate it into the code…
Inside the Circle.java file we'll have to add those 5 corresponding functions, four of them to control each edge of the board and one aggregating each check:
public void checkCollisions() {
    checkTopCollision();
    checkRightCollision();
    checkBottomCollision();
    checkLeftCollision();
}

private void checkTopCollision() {
    if (y + radius > Constants.HEIGHT) {
        y = Constants.HEIGHT - radius - 1;
        vy = -vy;
    }
}

private void checkRightCollision() {
    if (x + radius >= Constants.WIDTH) {
        x = Constants.WIDTH - radius - 1;
        vx = -vx;
    }
}

private void checkBottomCollision() {
    if (y - radius < 0) {
        y = radius + 1;
        vy = -vy;
    }
}

private void checkLeftCollision() {
    if (x - radius < 0) {
        x = radius + 1;
        vx = -vx;
    }
}
Let's create also the Constants class with some constant values which will be used in packages responsible for logic and for specific platform:
package pl.realcode;

public class Constants {
    public static final int WIDTH = 800;
    public static final int HEIGHT = 600;
    public static final String TITLE = "Circles";
    public static final int radius = 15;
}
Rendering the circles
Now we will work inside the CirclesGame class. Here we need to create, render and update our circles at each tick of the application. Let's understand what is the delta time. If you ever played any game or you know something about games there's always something called FPS (Frames per second). We want to render the circles regardless the FPS - what does it mean? You could experience this strange behavior while playing old, emulated games on powerful computer - which were CPU time dependent. The more FPS you get, the faster is the game. So when your character would travel 100 meters in 1 minute on slow computer, it would run for 2000 meters in 1 minute on the hi-end PC. To keep the game running the same nevertheless how powerful is the machine where it is running on - game creators are using delta time - so on the low class and high class PC character will travel the same distance in for example 1 minute like mentioned before. If this explanation wasn't clear enough or you want to learn more about it, don't hesitate to check this Wiki link: https://en.wikipedia.org/wiki/Delta_timing or you can just simply Google it!
Okay, let's clean our CirclesGame.java file. Let's change the red background to the black one and let's remove the image which is rendered there. Your code should look like that:
package pl.realcode;

import com.badlogic.gdx.ApplicationAdapter;
import com.badlogic.gdx.Gdx;
import com.badlogic.gdx.graphics.GL20;

public class CirclesGame extends ApplicationAdapter {

   @Override
   public void create () {
   }

   @Override
   public void render () {
      Gdx.gl.glClearColor(0, 0, 0, 1);
      Gdx.gl.glClear(GL20.GL_COLOR_BUFFER_BIT);
   }

   @Override
   public void dispose () {
   }
}
Your game window should look like that:
Previously, we have added helper class called Constants.java, now let's configure our Desktop window with parameters from that class. Go to the folder desktop and find the class pl.realcode.desktop.DesktopLauncher and add the width, height and title of the window to the configuration object:
package pl.realcode.desktop;

import com.badlogic.gdx.backends.lwjgl.LwjglApplication;
import com.badlogic.gdx.backends.lwjgl.LwjglApplicationConfiguration;
import pl.realcode.CirclesGame;
import pl.realcode.Constants;

public class DesktopLauncher {
   public static void main (String[] arg) {
      LwjglApplicationConfiguration config = new LwjglApplicationConfiguration();
      config.width = Constants.WIDTH;
      config.height = Constants.HEIGHT;
      config.resizable = false;
      config.title = Constants.TITLE;
      new LwjglApplication(new CirclesGame(), config);
   }
}
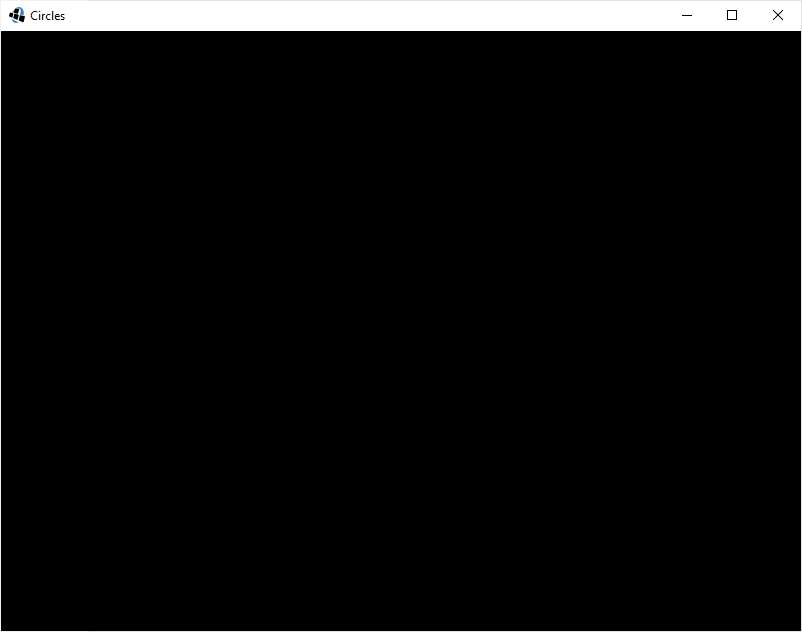
And here we go, you shall see the new title and dimensions of the window:
To start the rendering process we have to create the ShapeRenderer which will allow us to render filled shapes such as... Circles! Awesome! 🙂 Rendering process is divided to some steps:
- Clear the background
- Start rendering process
- Set color
- Render actual objects
- End rendering
As you might wonder in the class below, 3 first lines of he render() method allow us to draw objects with transparency setting. If it would be set to 1 then object will be visible in 100% and in the analogy setting it to 0 would make object invisible.
package pl.realcode;

import com.badlogic.gdx.ApplicationAdapter;
import com.badlogic.gdx.Gdx;
import com.badlogic.gdx.graphics.GL20;
import com.badlogic.gdx.graphics.glutils.ShapeRenderer;

public class CirclesGame extends ApplicationAdapter {
    private ShapeRenderer renderer;

    @Override
    public void create() {
        renderer = new ShapeRenderer();
    }

    @Override
    public void render() {
        Gdx.gl.glClear(GL20.GL_COLOR_BUFFER_BIT);
        Gdx.gl.glEnable(GL20.GL_BLEND);
        Gdx.gl.glBlendFunc(GL20.GL_SRC_ALPHA, GL20.GL_ONE_MINUS_SRC_ALPHA);

        renderer.begin(ShapeRenderer.ShapeType.Filled);
        renderer.setColor(1f, 0, 0, 0.78f);
        renderer.circle(275, 275, 25);
        renderer.setColor(0, 1f, 0, 0.50f);
        renderer.circle(300, 300, 25);
        renderer.setColor(0, 0, 1f, 0.60f);
        renderer.circle(310, 315, 25);
        renderer.end();
    }

    @Override
    public void dispose() {
        renderer.dispose();
    }
}
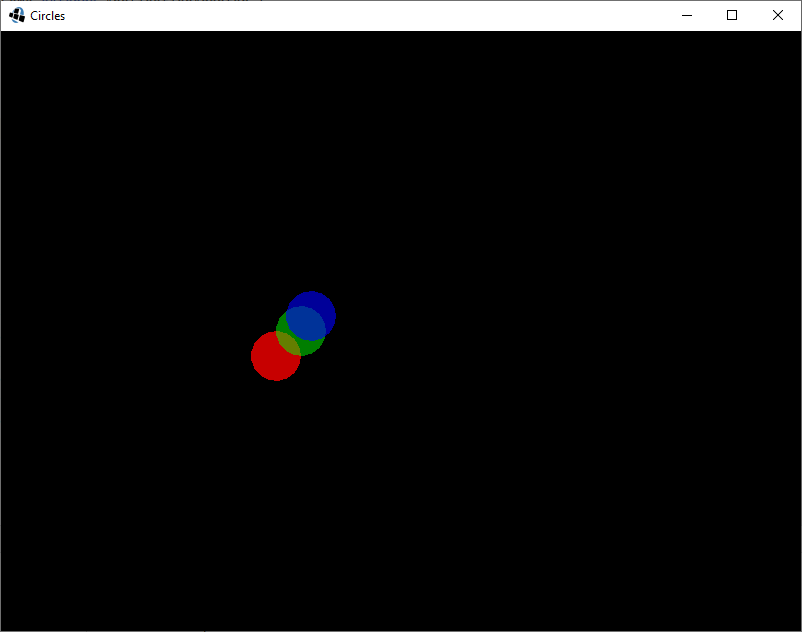
Here are the results of the current state of CirclesGame class:
Updating the circles position using delta time
As I mentioned in the previous section - we have to update the circles position after each tick. To do so let's remove the previous rendered circles from the CirclesGame class, so nothing will be rendered at this moment. Then we will create an array which will contain our circles + we need to check if the user did some interaction with the screen and if so - we have to add a new Circle object to our array. In order to check if user made an interaction we can use this event:
Gdx.input.isTouched()
Which can be used also with additional methods to get the X,Y point where the interaction took place.
Gdx.input.getX()
Gdx.input.getY()
Going back to delta time, we can use already made function:
Gdx.graphics.getDeltaTime();
And as we can read inside the docs:
Returns:
the time span between the current frame and the last frame in seconds. Might be smoothed over n frames.
So our main game class will look now like this:
package pl.realcode;

import com.badlogic.gdx.ApplicationAdapter;
import com.badlogic.gdx.Gdx;
import com.badlogic.gdx.graphics.GL20;
import com.badlogic.gdx.graphics.glutils.ShapeRenderer;

import java.util.ArrayList;

public class CirclesGame extends ApplicationAdapter {
    private ShapeRenderer renderer;
    private ArrayList<Circle> circles;

    @Override
    public void create() {
        renderer = new ShapeRenderer();
        circles = new ArrayList<>();
    }

    @Override
    public void render() {
        if (Gdx.input.isTouched()) {
            circles.add(new Circle(Gdx.input.getX(), Constants.HEIGHT
                    - Gdx.input.getY(), Constants.radius));
        }
        Gdx.gl.glClear(GL20.GL_COLOR_BUFFER_BIT);
        Gdx.gl.glEnable(GL20.GL_BLEND);
        Gdx.gl.glBlendFunc(GL20.GL_SRC_ALPHA, GL20.GL_ONE_MINUS_SRC_ALPHA);

        renderer.begin(ShapeRenderer.ShapeType.Filled);

        renderer.setColor(1f, 1f, 1f, 0.7f);
        for (Circle circle : circles) {
            circle.render(renderer);
            circle.updatePosition(Gdx.graphics.getDeltaTime());
        }
        renderer.end();
    }

    @Override
    public void dispose() {
        renderer.dispose();
    }
}
Now we have 2 methods which aren't yet ready:
circle.render(renderer);
circle.updatePosition(Gdx.graphics.getDeltaTime());
Let's implement them! We need to render the circle based on its position and radius, and update its position based on the time which passed between last and current frames. First render(ShapeRenderer renderer) method:
public void render(ShapeRenderer renderer) {
    renderer.circle(getX(), getY(),
            radius);
}

private int getY() {
    return (int) y;
}

private int getX() {
    return (int) x;
}
And now based on the delta time we need to create updatePostition(float deltaTime) method which will update position of each circle and check if the collision occured:
public void updatePosition(float deltaTime) {
    // Adding acceleration to velocity
    this.vx += this.ax;
    this.vy += this.ay;

    // Updating position based on the current speed and time
    this.x += this.vx * deltaTime;
    this.y += this.vy * deltaTime;

    checkCollisions();
}
First run
After this long story we came to this point where the game can be finally launched. So let's see what can you expect after implementing those lines of code.
Refactoring
There are two minor issues with our code which might not be seen at the first sight. First one is connected to the processing of array list. For-each type loop is not a good approach to process quickly large amount of data - pros of using it is of course readability. When large amount of circles will be added to our ArrayList, then game will be getting slower and slower. So if you want to have more FPS than Cyberpunk 2077 on PS4 - we have to change the loop to another one like it is mentioned here: https://dzone.com/articles/iteration-over-java-collections-with-high-performa
To do so, I moved this fragment of code:
Gdx.gl.glClear(GL20.GL_COLOR_BUFFER_BIT);
Gdx.gl.glEnable(GL20.GL_BLEND);
Gdx.gl.glBlendFunc(GL20.GL_SRC_ALPHA, GL20.GL_ONE_MINUS_SRC_ALPHA);

renderer.begin(ShapeRenderer.ShapeType.Filled);

renderer.setColor(1f, 1f, 1f, 0.7f);
for (Circle circle : circles) {
    circle.render(renderer);
    circle.updatePosition(Gdx.graphics.getDeltaTime());
}
renderer.end();
to the method handleRendering() and I have changed the for-each loop to the C-style loop which is using Iterator and new overloaded method render(ShapeRenderer renderer, float deltaTime):
private void handleRendering() {
    Gdx.gl.glClear(GL20.GL_COLOR_BUFFER_BIT);
    Gdx.gl.glEnable(GL20.GL_BLEND);
    Gdx.gl.glBlendFunc(GL20.GL_SRC_ALPHA, GL20.GL_ONE_MINUS_SRC_ALPHA);

    renderer.begin(ShapeRenderer.ShapeType.Filled);
    renderer.setColor(1f, 1f, 1f, 0.7f);

    int size = circles.size();
    float delta = Gdx.graphics.getDeltaTime();
    Iterator<Circle> iterator = circles.iterator();
    for(int i = 0; i < size; i++){
        iterator.next().render(renderer, delta);
    }

    renderer.end();
}
public void render(ShapeRenderer renderer, float deltaTime) {
    render(renderer);
    updatePosition(deltaTime);
}
Second problem is noticeable when you will try to create new circles on the edge of the screen. When the point + its radius is outside the screen on the moment of creation and acceleration moves circle to that edge, then it quickly losses it's velocity and circle stays glued to the edge. To get rid of the problem we have to check the X,Y position before creating the Circle object. When the position will be lower than half of the width or half of the height of the screen then acceleration will be positive. In other case acceleration should be negative.
I moved code responsible to carry user input to separate method and it looks now:
private void handleInput() {
    if (Gdx.input.isTouched()) {
        int x = Gdx.input.getX();
        int y = Constants.HEIGHT - Gdx.input.getY();
        int radius = Constants.radius;
        circles.add(new Circle(x, y, radius));
    }
}
I also added necessary checks to the constructor of Circle class:
public Circle(int x, int y, int radius) {
    this.x = x;
    this.y = y;
    this.radius = radius;

    vy = Utils.rand(-20, 20);
    vx = Utils.rand(-20, 20);

    if (x < Constants.WIDTH / 2) {
        ax = Utils.rand(0, 15);
    } else {
        ax = Utils.rand(-15, 0);
    }

    if (y < Constants.HEIGHT / 2) {
        ay = Utils.rand(0, 15);
    } else {
        ay = Utils.rand(-15, 0);
    }
}
Preparing code for Android
First we need to change our Constants class as we can't hardcode constant width and height anymore because each Android phone device can have different resolution. Code will look now like this:
package pl.realcode;

import com.badlogic.gdx.Gdx;

public class Constants {
    public static final int WIDTH = Gdx.graphics.getWidth();
    public static final int HEIGHT = Gdx.graphics.getHeight();
    public static final String TITLE = "Circles";
    public static final int radius = 15;
}
And we need to change launcher configuration for Desktop app:
package pl.realcode.desktop;

import com.badlogic.gdx.backends.lwjgl.LwjglApplication;
import com.badlogic.gdx.backends.lwjgl.LwjglApplicationConfiguration;
import pl.realcode.CirclesGame;
import pl.realcode.Constants;

public class DesktopLauncher {
   public static void main (String[] arg) {
      LwjglApplicationConfiguration config = new LwjglApplicationConfiguration();
      config.width = 800;
      config.height = 600;
      config.resizable = false;
      config.title = Constants.TITLE;
      new LwjglApplication(new CirclesGame(), config);
   }
}
Next we will add a little bit of interaction besides the actual creation of the circles. To do so, we need to change the acceleration using the accelerometer from the Android device - we will add this inside the updatePosition method of the Circle class. First we need to change the application to work in portait mode. Inside android folder find AndroidManifest.xml and change
android:screenOrientation="landscape"
into this:
android:screenOrientation="portrait"
Next let's update our updatePosition method:
public void updatePosition(float deltaTime) {
    if (Gdx.input.isPeripheralAvailable(Input.Peripheral.Accelerometer)) {
        this.ax = -Gdx.input.getAccelerometerX() * 12 % 15;
        this.ay = -Gdx.input.getAccelerometerY() * 12 % 15;
    }

    // Adding acceleration to velocity
    this.vx += this.ax;
    this.vy += this.ay;

    // Updating position based on the current speed and time
    this.x += this.vx * deltaTime;
    this.y += this.vy * deltaTime;

    checkCollisions();
}
To add more real physics, let's also decrease velocity by half after each colission:
private void checkTopCollision() {
    if (y + radius > Constants.HEIGHT) {
        y = Constants.HEIGHT - radius - 1;
        vy = -vy;
        vy *= 0.5f;
    }
}

private void checkRightCollision() {
    if (x + radius >= Constants.WIDTH) {
        x = Constants.WIDTH - radius - 1;
        vx = -vx;
        vx *= 0.5f;
    }
}

private void checkBottomCollision() {
    if (y - radius < 0) {
        y = radius + 1;
        vy = -vy;
        vy *= 0.5f;
    }
}

private void checkLeftCollision() {
    if (x - radius < 0) {
        x = radius + 1;
        vx = -vx;
        vx *= 0.5f;
    }
}
And that's it! You can run your game again using desktop to see how this impacted the behavior of the environment.
Compiling and deploying the .apk to the real device or emulator
To create the .apk we need to run Gradle build command which is this:
gradlew android:assembleDebug
After this command is launched, you can find your apk file here: Circles\android\build\outputs\apk\debug\android-debug.apk
You can read more about the packaging here: https://libgdx.badlogicgames.com/documentation/gettingstarted/Packaging.html
Next you can create your AVD and then drag&drop your .apk file into it and you can run your application like any other Android app or you can send it to the real Android device and allow it to be installed. If you don't know how to create the AVD please refer to this article: https://developer.android.com/studio/run/managing-avdshttps://developer.android.com/studio/run/managing-avds
You can see the desired effect on the movie below:
The full code can be found on GitHub:
https://github.com/slade13/Circles
And the .apk can be downloaded from here:
Name: android-debug.apk
Size: 2568539 bytes (2508 KiB)
CRC32: 41598E57
CRC64: D55E1728AE4CADC5
SHA256: 0D98507E787713B60B0C3D6053BC13733FB9847634DCEBF2B19981BA76414751
SHA1: 37071B7AF9FC777CCC79CF4048B86CB7F2523C06
BLAKE2sp: 4D493A9DEB8A71F25B580803C6BF87B4D1337EE4ACE0954815F80D8D9A967E11
Please verify the SHA checksum to be sure that this file will not harm your device!